Skip to content
8 AWG to 6 AWG Copper Split Bolt Connector

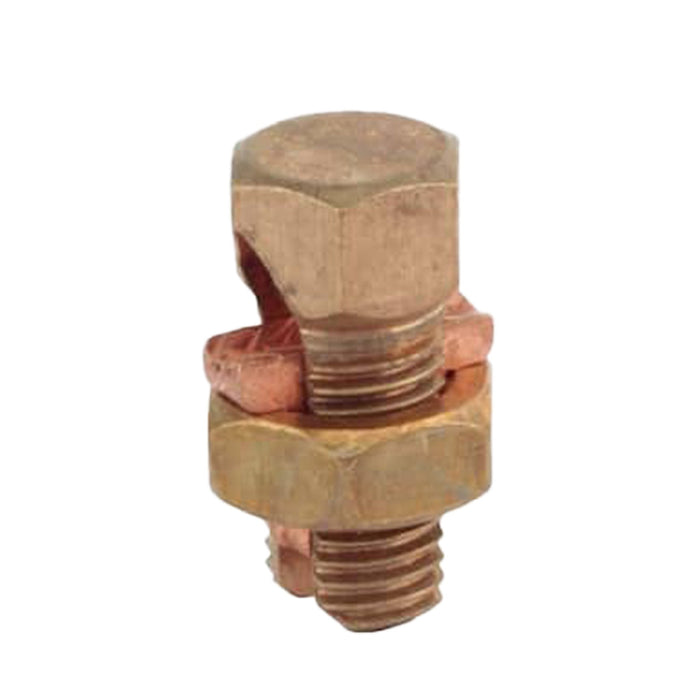
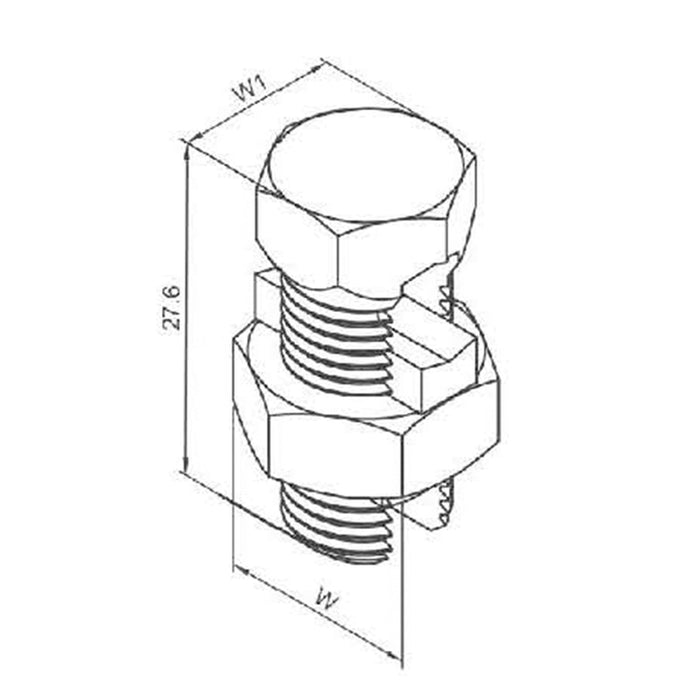
10 AWG to 12 AWG Copper Split Bolt Connector

Description:

The 8-10 AWG Split Bolt Connector is an essential component in power and grounding electrical connection applications, offering a reliable solution for splicing, tapping, and terminating conductors. This connector is meticulously crafted from a high-strength copper alloy, ensuring not only superior conductivity but also resistance to corrosion and seasonal cracking. Its robust construction guarantees a durable and long-lasting connection in a variety of environmental conditions.

Features:

  • Material Excellence: Manufactured from a high-strength copper alloy, providing a sturdy and reliable connection.
  • Ease of Installation: The bolt and nut feature a hex design, allowing for easy installation with standard tooling, simplifying the process and saving time.
  • Versatile Use: Specifically designed for copper to copper connections, ensuring compatibility and efficiency.
  • User-Friendly Design: Free running threads and easy-to-grip wrench flats make installation hassle-free.
  • Optimal Pressure: Engineered to provide maximum pressure, ensuring a secure connection across all combinations of connectors.

Certifications:

  • cULus 467 & 486A Listed: Meets the standards for safety and performance, ensuring reliability in its applications.
  • CSA 22.2 Certified: Certified by the Canadian Standards Association, indicating quality and safety.
  • Voltage and Temperature Rating: Rated for 600 Volts / 90°C, accommodating high voltage and temperature requirements.

Installation Instructions:

  1. Preparation: Ensure all power is turned off before starting the installation. Clean the conductors to ensure they are free of any dirt or oxidation.
  2. Placement: Position the conductors that need to be connected within the split bolt.
  3. Securing: Insert the bolt through the conductors and hand-tighten the nut onto the bolt. Once hand-tightened, use a standard wrench to securely tighten the bolt and nut, ensuring a firm and reliable connection.
  4. Final Inspection: Double-check the connection to ensure it is tight and secure. If necessary, apply electrical tape or other protective material to safeguard the connection from environmental factors.
  5. Testing: After installation, test the connection to verify electrical continuity and integrity.